For those who long for light and bright, chic and shabby interiors, Halloween decor can be a bit daunting. How does one take something so lovely, not to mention pink, and turn it into something spooky and menacing? Take, for instance, the sweet bride doll that lives in my kitchen cabinet. Enclosed in a glass cloche with a skeleton to guard her amongst the cobwebs, she becomes the epitome of spooky and menacing.
  White is the picture of summer but it makes the perfect backdrop for changing seasons as can be seen in the photo below . . .
My large all white mantel provides a lot of space to cover. Sparse is just right for the warm months but when it cools off outside, one wants to turn up the heat inside . . .

. . . .in which case, more is much, much more. (Click HERE if you want to see how we made this fireplace on our lonesomes . . .)

With a few changes, switches, and removals, one can turn delicate beauty . . .

. . . into the picture of fright!

Often, one can find things they already have to enhance holiday decor. The "haunted house" photo below is a black and white version of a photo I took of the stables at the home of Lord Byron in Nottinghamshire, England. It was one of my favorite buildings in all of Britain but printed without color and cropped a bit askew, it is as haunted-looking as they come.

 The frame in this photo was purchased at a flea market for $2 as it is warped. I can't hang it on the wall but it makes for an interesting statement in this Halloween tableaux.

I had the poster print above the mantel made online from a free-use antique postcard by Ellen Clapsaddle. It has just the right antique, primitive Halloween look I was going for. It certainly seems to have the black tabby spooked!
 What displays as a lovely summer green on the walls in proper lighting . . .
 . . . .glows an eerie Wicked-Witch-of-the-West-green in the candlelight.
 A corner of the bureau dressed in summer . . .
 . . . with a few switches and additions becomes a ghostly altar. Ancestor photos featuring children in white clothing and mustachioed men framed in black puts a whole new light on the previously sweet-looking garden statue.
 One of the easiest ways to make your light and bright interiors say "boo!" is to . . .
 . . . add some simple witches hats made out of black construction paper to your photos and artwork. Everybody looks good in a witch hat at Halloween!
 The darker, more Victorian-looking hallway here is easily made spooky . . .
 . . . with the addition of a few battery operated votive candles. (The glass-doored cabinet to the right of the photo below will be the subject of a later before and after post. Go HERE for a post on how I turned this landing from something ho-hum into the library I yearned for.)

The alternate view of the hall in this photo shows my bedroom door sporting its new trim and glass paned door---a post for another day, as well.
 Another example of how removing a few things and adding a few others creates impact! (Click HERE to see how we made this cave of an entryway a thing of beauty.)
 The roses and white linen is removed and replaced with items that will stay until the end of winter. . . that is, with a "few" exceptions . . .

 Let's see that bat attack one more time. Before . . .
 . . . and after! Bat patterns are widely available on the internet. Trace onto black construction paper and cut them out while you are watching T.V.--then tape them anywhere and everywhere for a fun flock of festive fright! The addition to black shades on the chandelier help to add that eerie glow.
 Remember my kitchen window re-do this past spring? (see HERE for the before and after for the window project) As much as I adore the new look . . .
 . . .I wanted something a bit heavier for the cold months of the year. The black chandelier spends six months of the year outside and three or four months above my kitchen sink. It's just enough of a change to say "Halloween" without a lot of fuss.
The orange shade over the lamp in the corner of the counter makes a big, but easy, difference, too.

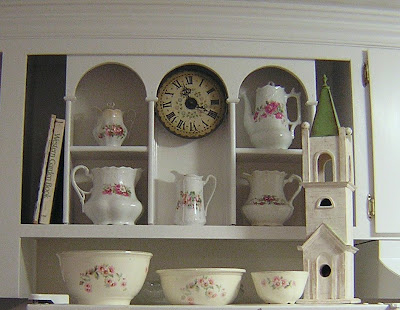
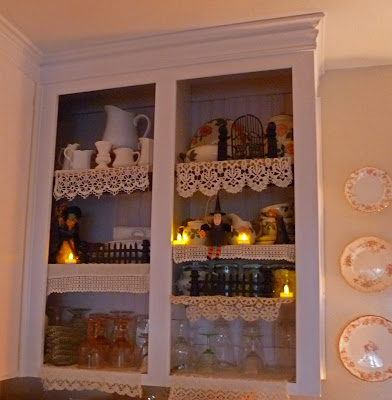
These cabinets started out as builder quality, i.e., old and ugly. Go HERE to read how I made them something a bit more special. Scroll down to see how I made them "spooky".
 This metal sculpture is the perfect size to hide the flowery decor on the top of my fridge and adds a lot of sparkle, too.


. . . .in which case, more is much, much more. (Click HERE if you want to see how we made this fireplace on our lonesomes . . .)

With a few changes, switches, and removals, one can turn delicate beauty . . .

. . . into the picture of fright!

Often, one can find things they already have to enhance holiday decor. The "haunted house" photo below is a black and white version of a photo I took of the stables at the home of Lord Byron in Nottinghamshire, England. It was one of my favorite buildings in all of Britain but printed without color and cropped a bit askew, it is as haunted-looking as they come.

 The frame in this photo was purchased at a flea market for $2 as it is warped. I can't hang it on the wall but it makes for an interesting statement in this Halloween tableaux.
I had the poster print above the mantel made online from a free-use antique postcard by Ellen Clapsaddle. It has just the right antique, primitive Halloween look I was going for. It certainly seems to have the black tabby spooked!
 What displays as a lovely summer green on the walls in proper lighting . . .
 . . . .glows an eerie Wicked-Witch-of-the-West-green in the candlelight.
  A corner of the bureau dressed in summer . . .
  . . . with a few switches and additions becomes a ghostly altar. Ancestor photos featuring children in white clothing and mustachioed men framed in black puts a whole new light on the previously sweet-looking garden statue.
  One of the easiest ways to make your light and bright interiors say "boo!" is to . . .
 . . . add some simple witches hats made out of black construction paper to your photos and artwork. Everybody looks good in a witch hat at Halloween!
 The darker, more Victorian-looking hallway here is easily made spooky . . .
 . . . with the addition of a few battery operated votive candles. (The glass-doored cabinet to the right of the photo below will be the subject of a later before and after post. Go HERE for a post on how I turned this landing from something ho-hum into the library I yearned for.)
The alternate view of the hall in this photo shows my bedroom door sporting its new trim and glass paned door---a post for another day, as well.
 Another example of how removing a few things and adding a few others creates impact! (Click HERE to see how we made this cave of an entryway a thing of beauty.)
 The roses and white linen is removed and replaced with items that will stay until the end of winter. . . that is, with a "few" exceptions . . .
 Let's see that bat attack one more time. Before . . .
  . . . and after! Bat patterns are widely available on the internet. Trace onto black construction paper and cut them out while you are watching T.V.--then tape them anywhere and everywhere for a fun flock of festive fright! The addition to black shades on the chandelier help to add that eerie glow.
 Remember my kitchen window re-do this past spring? (see HERE for the before and after for the window project) As much as I adore the new look . . .
 . . .I wanted something a bit heavier for the cold months of the year. The black chandelier spends six months of the year outside and three or four months above my kitchen sink. It's just enough of a change to say "Halloween" without a lot of fuss.
The orange shade over the lamp in the corner of the counter makes a big, but easy, difference, too.

These cabinets started out as builder quality, i.e., old and ugly. Go HERE to read how I made them something a bit more special. Scroll down to see how I made them "spooky".
 This metal sculpture is the perfect size to hide the flowery decor on the top of my fridge and adds a lot of sparkle, too.
A few similar addtions to the shelves here create the same look with ease.

With just a few tricks and treats, you can make any decor say "hisssss" and "eeek!"


With just a few tricks and treats, you can make any decor say "hisssss" and "eeek!"
Happy Halloween!!!